Embark on an intergalactic adventure where you’ll study bright galaxies, envision new planets, and explore futuristic technology in this imaginative science activity book for kids!
The Space Science Handbook takes children on a tour of the cosmos through scientific experiments, creative projects, and demonstrations. In addition to exploring aspects of the solar system, extraterrestrial life, and space technology, this book teaches vital scientific concepts and helps children consider sociological and philosophical implications of a future in the stars. Each experiment includes a mission brief, simple instructions and diagrams, and an explanation of the science at work!
Experiments include:
Atmospheric Pressure: Crush a can using the Earth’s atmosphere
Turbulent Flow: Study turbulent flow using milk, food coloring, and dish soap
As new parents, we’re told not give babies cow milk before the age of one and only offer breastmilk or formula. It’s a common misconception that this is due to a potential for allergies, but in fact it is because cow and other animal milks lack the specific nutrients a baby needs. If the child has animal or plant-based milk in place of human breastmilk or formula, they can develop a nutrient deficiency.
Breastmilk has evolved over thousands of years to provide an infant with a balanced profile of the nutrients it needs. Whale milk is different from cow milk, which is different from goat milk, which is different from human milk. Each animals’s milk is specific to each infant animal’s needs and in a form that their bodies can absorb. Even if the goat or cow’s milk you find is straight from the udder, unprocessed and unpasteurized, it is still not the correct profile of nutrients for a human infant. Therefore, non-human animal milk cannot replace breastmilk until the infant is eating a substantial and varied amount of solid foods, which doesn’t occur until around their first birthday.
Luckily, modern science has been able to approximate human breastmilk nutrients in formula, and it has proven to be a perfectly sufficient replacement. There are of course differences, namely immunological components, but in terms of the nutrient profile versus another animal’s milk, formula is the far superior choice. This also applies to any plant-based milks on the market, however if you are interested in a plant-based formula, please be sure it is FDA approved as quality and formulations can vary.
Because cow milk-avoidance prior to the first year is not an issue of allergy in most babies, it is completely fine to offer them milk in the form of cheese, baked goods, etc as part of their increasingly solid diet. If you do suspect allergy, however, consult your doctor for the best way to approach this as there has been a lot of new early-years food allergy research in the past several years.
You may have heard the advice that infants under one year of age should not have honey. This has nothing to do with sugar intake, but instead we are concerned about the possible presence of spores of Clostridium botulinum, the bacteria that causes the illness botulism. These spores can become active in an infant’s digestive tract and poison them with a toxin it produces.
Clostridium botulinum produces botulism toxin, which can kill even the most healthy adult. This bacteria can be found in soils and waters all around the world and grows best in low acid, low oxygen environments, which is why improperly canned foods are the most common example of how humans may encounter the bacteria and toxin. Canned foods are usually fruits or vegetable brought in from outside, where they may become contaminated by the bacteria, then when canned improperly, the bacteria can thrive and produce the toxin. Botulism toxin is the most potent toxin that we know of, when considering the amount needed to cause death.
Clostridium botulinum can form spores, which are a type of cell that has low biological activity so that it can withstand non-ideal conditions. These spores can be found in soil, dust, and water and can be spread by things like wind. If the botulinum spore ends up in more favorable conditions it can transition to become the active bacteria again, which will produce botulism toxin.
Since honey is a natural product, it can contain Clostridium botulinum spores if they happened to have been carried into the hive somehow. The spores will not turn active in the honey and produce the toxin (unlike improperly canned goods), which is why eating honey is not an issue for adults. However, the spores CAN grow in an infant’s immature digestive tract and begin to produce the toxin. An adult’s digestive tract is not hospitable for the spores to transition, so we are only concerned about infants in this scenario.
There is nothing special about honey that makes it particularly prone to cause infant botulism. Historically however, it has been a common source of poisonings because of infant feeding or soothing customs. The main source of infant exposure to botulism spores is through soil and dust from the natural environment. This of course is unavoidable, so honey (which is avoidable) has gotten the most attention.
If your infant is exposed to honey (I’ve inadvertently given it to my infants in marinades or dressings, it happens!), there is no cause for immediate concern. Infant botulism is still exceedingly rare, but it is always helpful to be vigilant and aware of the symptoms as quick treatment will save the child’s life. Symptoms occur within a day or so (though they may take longer, even weeks, to fully actualize) and include floppiness, poor feeding, drowsiness, constipation, and a weak cry. If you notice of these symptoms even without honey exposure, especially weakness and floppiness as it is seen in around 88% of cases (citation), get medical attention immediately.
Infant botulism is definitely a scary thing, but with the knowledge of both how it occurs and what symptoms to look for, we can better protect our children.
I’ve partnered with HP to create a series of printables to help you bring some science home! First up is this amazing DNA-inspired friendship bracelet craft where you can encode a secret message right into the bracelet! I created this project at the beginning of the pandemic lockdowns, thinking that a lot of kids would be feeling isolated from their friends. I thought this would be a fun project to not only make, but then send to a friend who can then decode the bracelet and feel some love from afar.
The printable from HP includes a short lesson on DNA and how it serves as coded instructions for our cells. It also includes a full tutorial on the project, a blank bracelet code sheet, a bracelet creation sheet, and a full example to get you started. I’ve have this friendship bracelet project in my head for so long and I’m so excited that HP could help share it with such a wide audience.
This site may contain affiliate links. If you make a purchase through the link, we earn a small commission at no extra cost to you. This commission helps fund the blog. We appreciate your support!
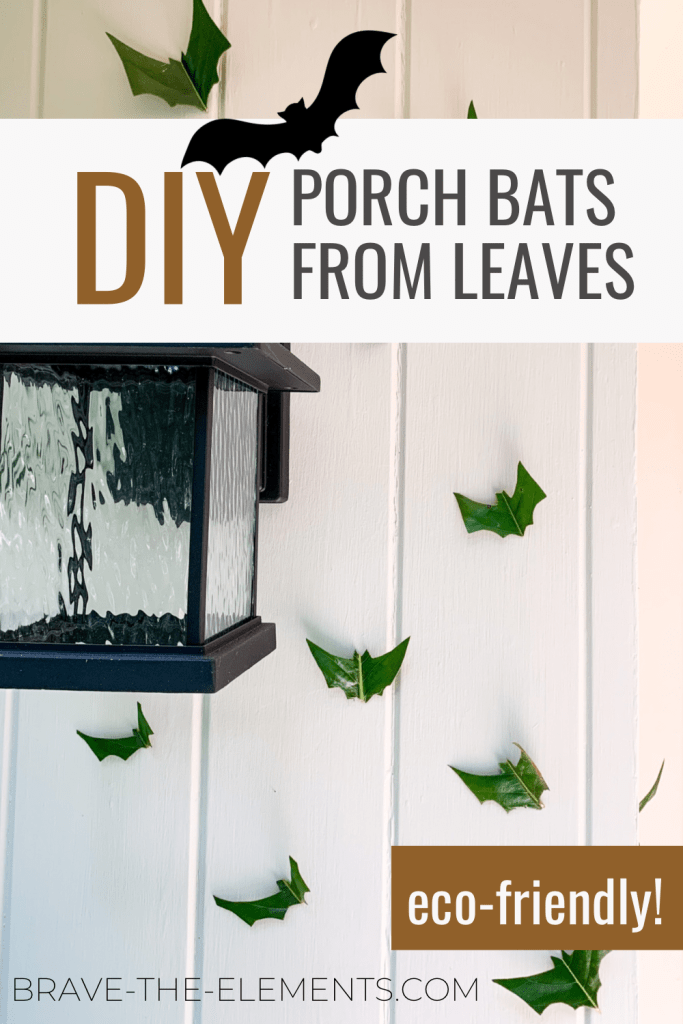
These leaf bats are actually one of my kid’s ideas. We use our giant magnolia tree’s leaves for crafts all year long, and her inspiration was some paper bats that we have in the house. The leaf version will only last a season but making them could become a great tradition every October.
How to make leaf bats- an eco-friendly halloween decoration
Leaf Bat Halloween Decorations
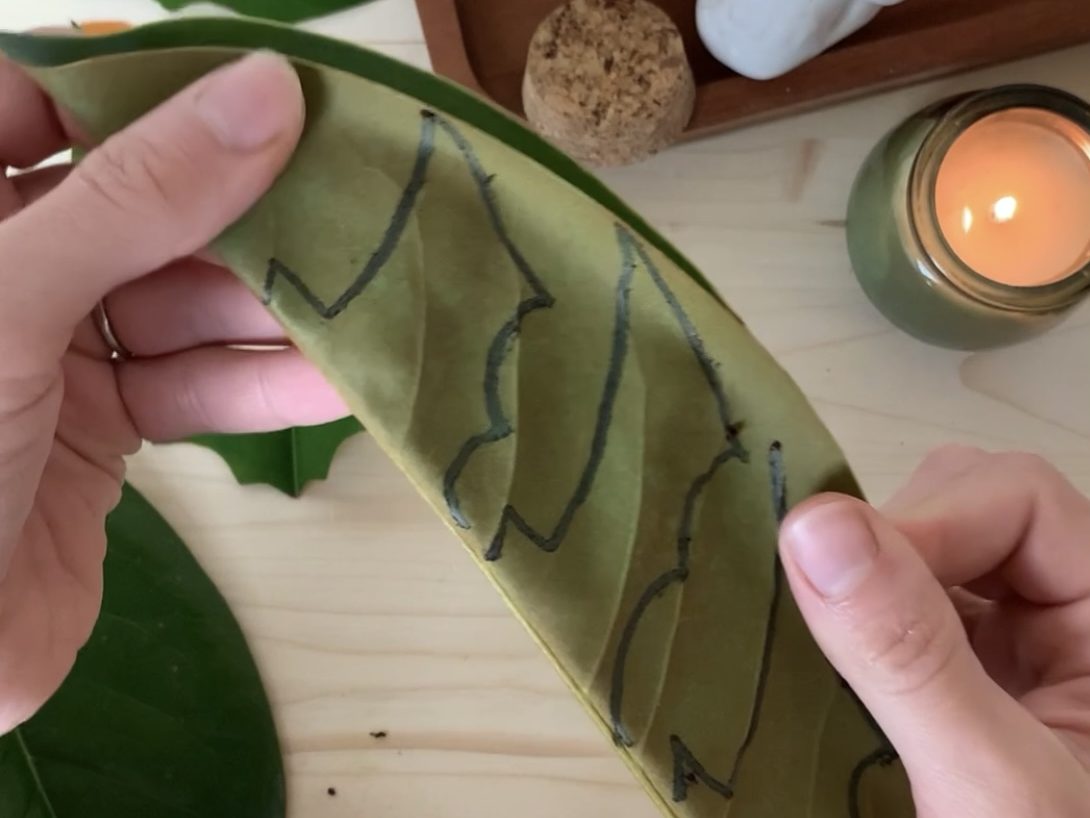
Find thick, waxy leaves, like from a magnolia or red oak, and let them dry (or find some from the ground that have dried somewhat. If you can’t find a tree with thick leaves, take any leaf (that is large enough to make a bat) and press it between the pages of a large book for a few days. If the leaf isn’t dry or pressed, it will curl up a few days after you cut it.
If the leaf is waxy, you might be able to fold it in half like I do in the picture below (if not just cut out the whole bat instead of half). Draw the shape of a half bat on the leaf as many times as will fit. Cut it out. Repeat for as many bats as you want.
Optional: paint the leaf bats black.
Hang on your wall with painters tape or sticky tack. To get the look of bats coming from a distance, place the smaller bats at the bottom of your design and the larger ones towards the top, and make the whole bunch fan out from the starting point.
Science!
-Bats are actually integral pollinators and hundreds of species of plants rely on them as primary pollinators.
-Bat are not blind! This is a common misconception to justify their amazing ability to echolocate, but bats actually have fantastic night vision. Recent research has even shown some bats can see well in the day time, and some even have the ability to see ultraviolet light! (PLoS One. 2009; 4(7): e6390)
-Bats can help in the management of mosquitoes. Take a look at installing bat boxes to welcome them onto your land.
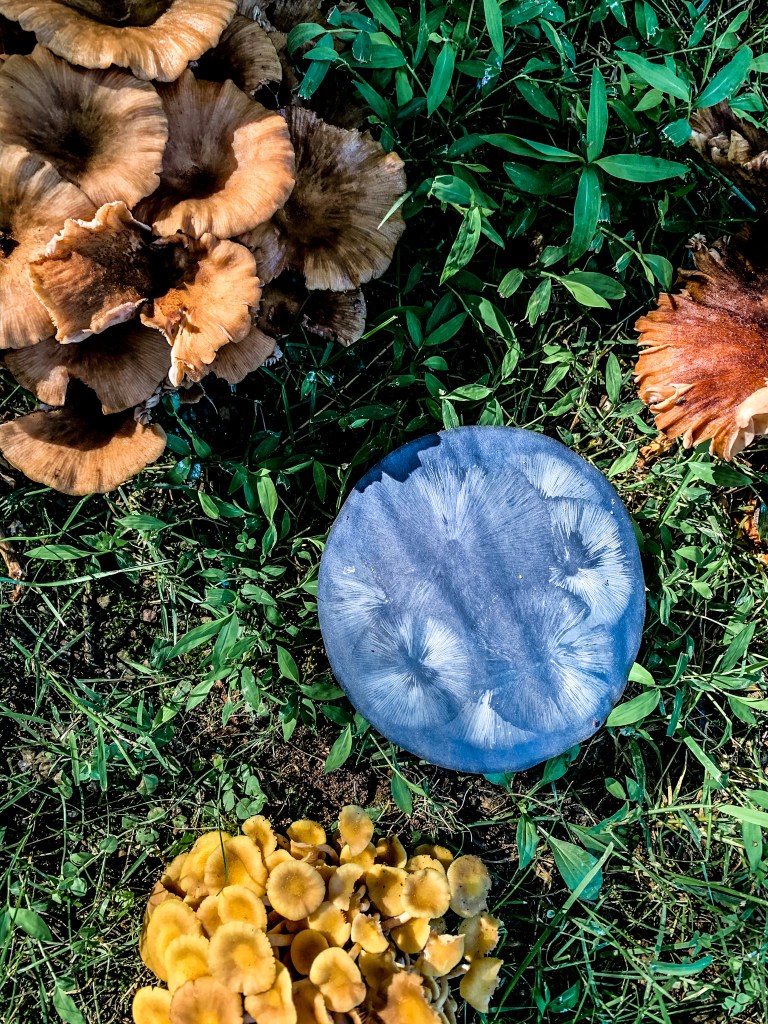
Spore prints are best made from fresh mushrooms found outdoors. They are a stunning way to observe and study nature. Learn how to gather, print, and preserve these delicate pieces of art.
Mushrooms are fascinating. They are pervasive in folklore and iconography, and evoke feelings that range from unnerving to adorable. I was once intimidated by mushrooms. I didn’t want to touch them and I was scared that my children would eat one. Then I moved to a property that was speckled with hundreds of mushrooms come the end of summer. Every step, we could point out a new variety and it was interesting and frightening and I was drawn in.
I decided that, like many other fears I’ve had in my life, the best way to deal with it is to learn more and study it. One of the first projects I did was taking spore prints because it required me to face my fear and touch them. Now after borrowing many books from the library, exposing myself to the world of mushroom hunting, and strolling our property for mushrooms every night in the late summer, I have a deep respect and mild obsession with these organisms. Let’s learn a bit about them.
I have this thing with plants. I dream of having a rainforest in my home one day, but until recently, I’ve had a pretty black thumb. I tried to grow many different house plants when I got my first place, but I killed every single one of them. From fungus gnat larvae bursting through the soil after I tried to set up a DIY home irrigation system from leftover LPLC parts, to hydrogen sulfide-producing bacteria in the soil of a philodendron making my little condo smell like the end-days of the Permian extinction, it was pretty much a comedy of errors.
Fast forward years later, I have about fifty different plants dotting our home- healthy, happy, and content. I didn’t raise these plants without problems though. For example, a snake plant and I battled a nasty (I mean NASTY) millipede infestation soon after I first bought it .
Plant motherhood is not all glamorous foliage, but the most important thing I learned is that you can’t just buy any plant at Home Depot, water the crap out of it, and expect it to thrive. You have to learn what each plant needs: soil type (airy, dense, sandy, etc), light (high, low, morning, etc), watering (drainage, frequency, dry depth, etc.), general care (humidity, cleaning, pruning, etc). In doing so, I’ve really come to appreciate every little thing about my plants, from the different types of variegation on each leaf to the climate where they were originally from.
The amazing teacher and science communicator, Naomi Volain, created a beautiful website called Plants Go Global to educate and raise awareness about plants to help solve our planet’s environmental problems. A part of this movement is appreciating the beauty of plants and fighting “plant blindness”- where the plants we see everyday just fade into the background of our view, not focusing on the importance, diversity, and striking beauty of them. I have combatted my own plant blindness by becoming a plant mom at home and outside, and I hope to pass this on to my kids by educating them on everything from house plants to vegetable gardens to plant anatomy and biodiversity. Visit the site for more information!
Recently, my snake plant was blown over by the wind from an open window and a long leaf snapped off. I decided to use it to make some new plants. The process is so simple that a three-year-old can do it (and she did). Read on below in the discussion for more about the science behind propagation through cuttings, and some tips to do this project with a child.
Materials
Products include affiliate links. You will not pay extra, but a small portion of your payment will go to keeping this site up and running! We appreciate your support.
Healthy mother plant
Pot or container with drainage
Proper rooting medium. This replaces soil for the time being (see below for why). The medium needs to be airy, light (not compact), well draining, non-nutritive, and moist. There are several ways to achieve this:
Method (How to make plant cuttings for propagation)
Put your cutting medium into the container.
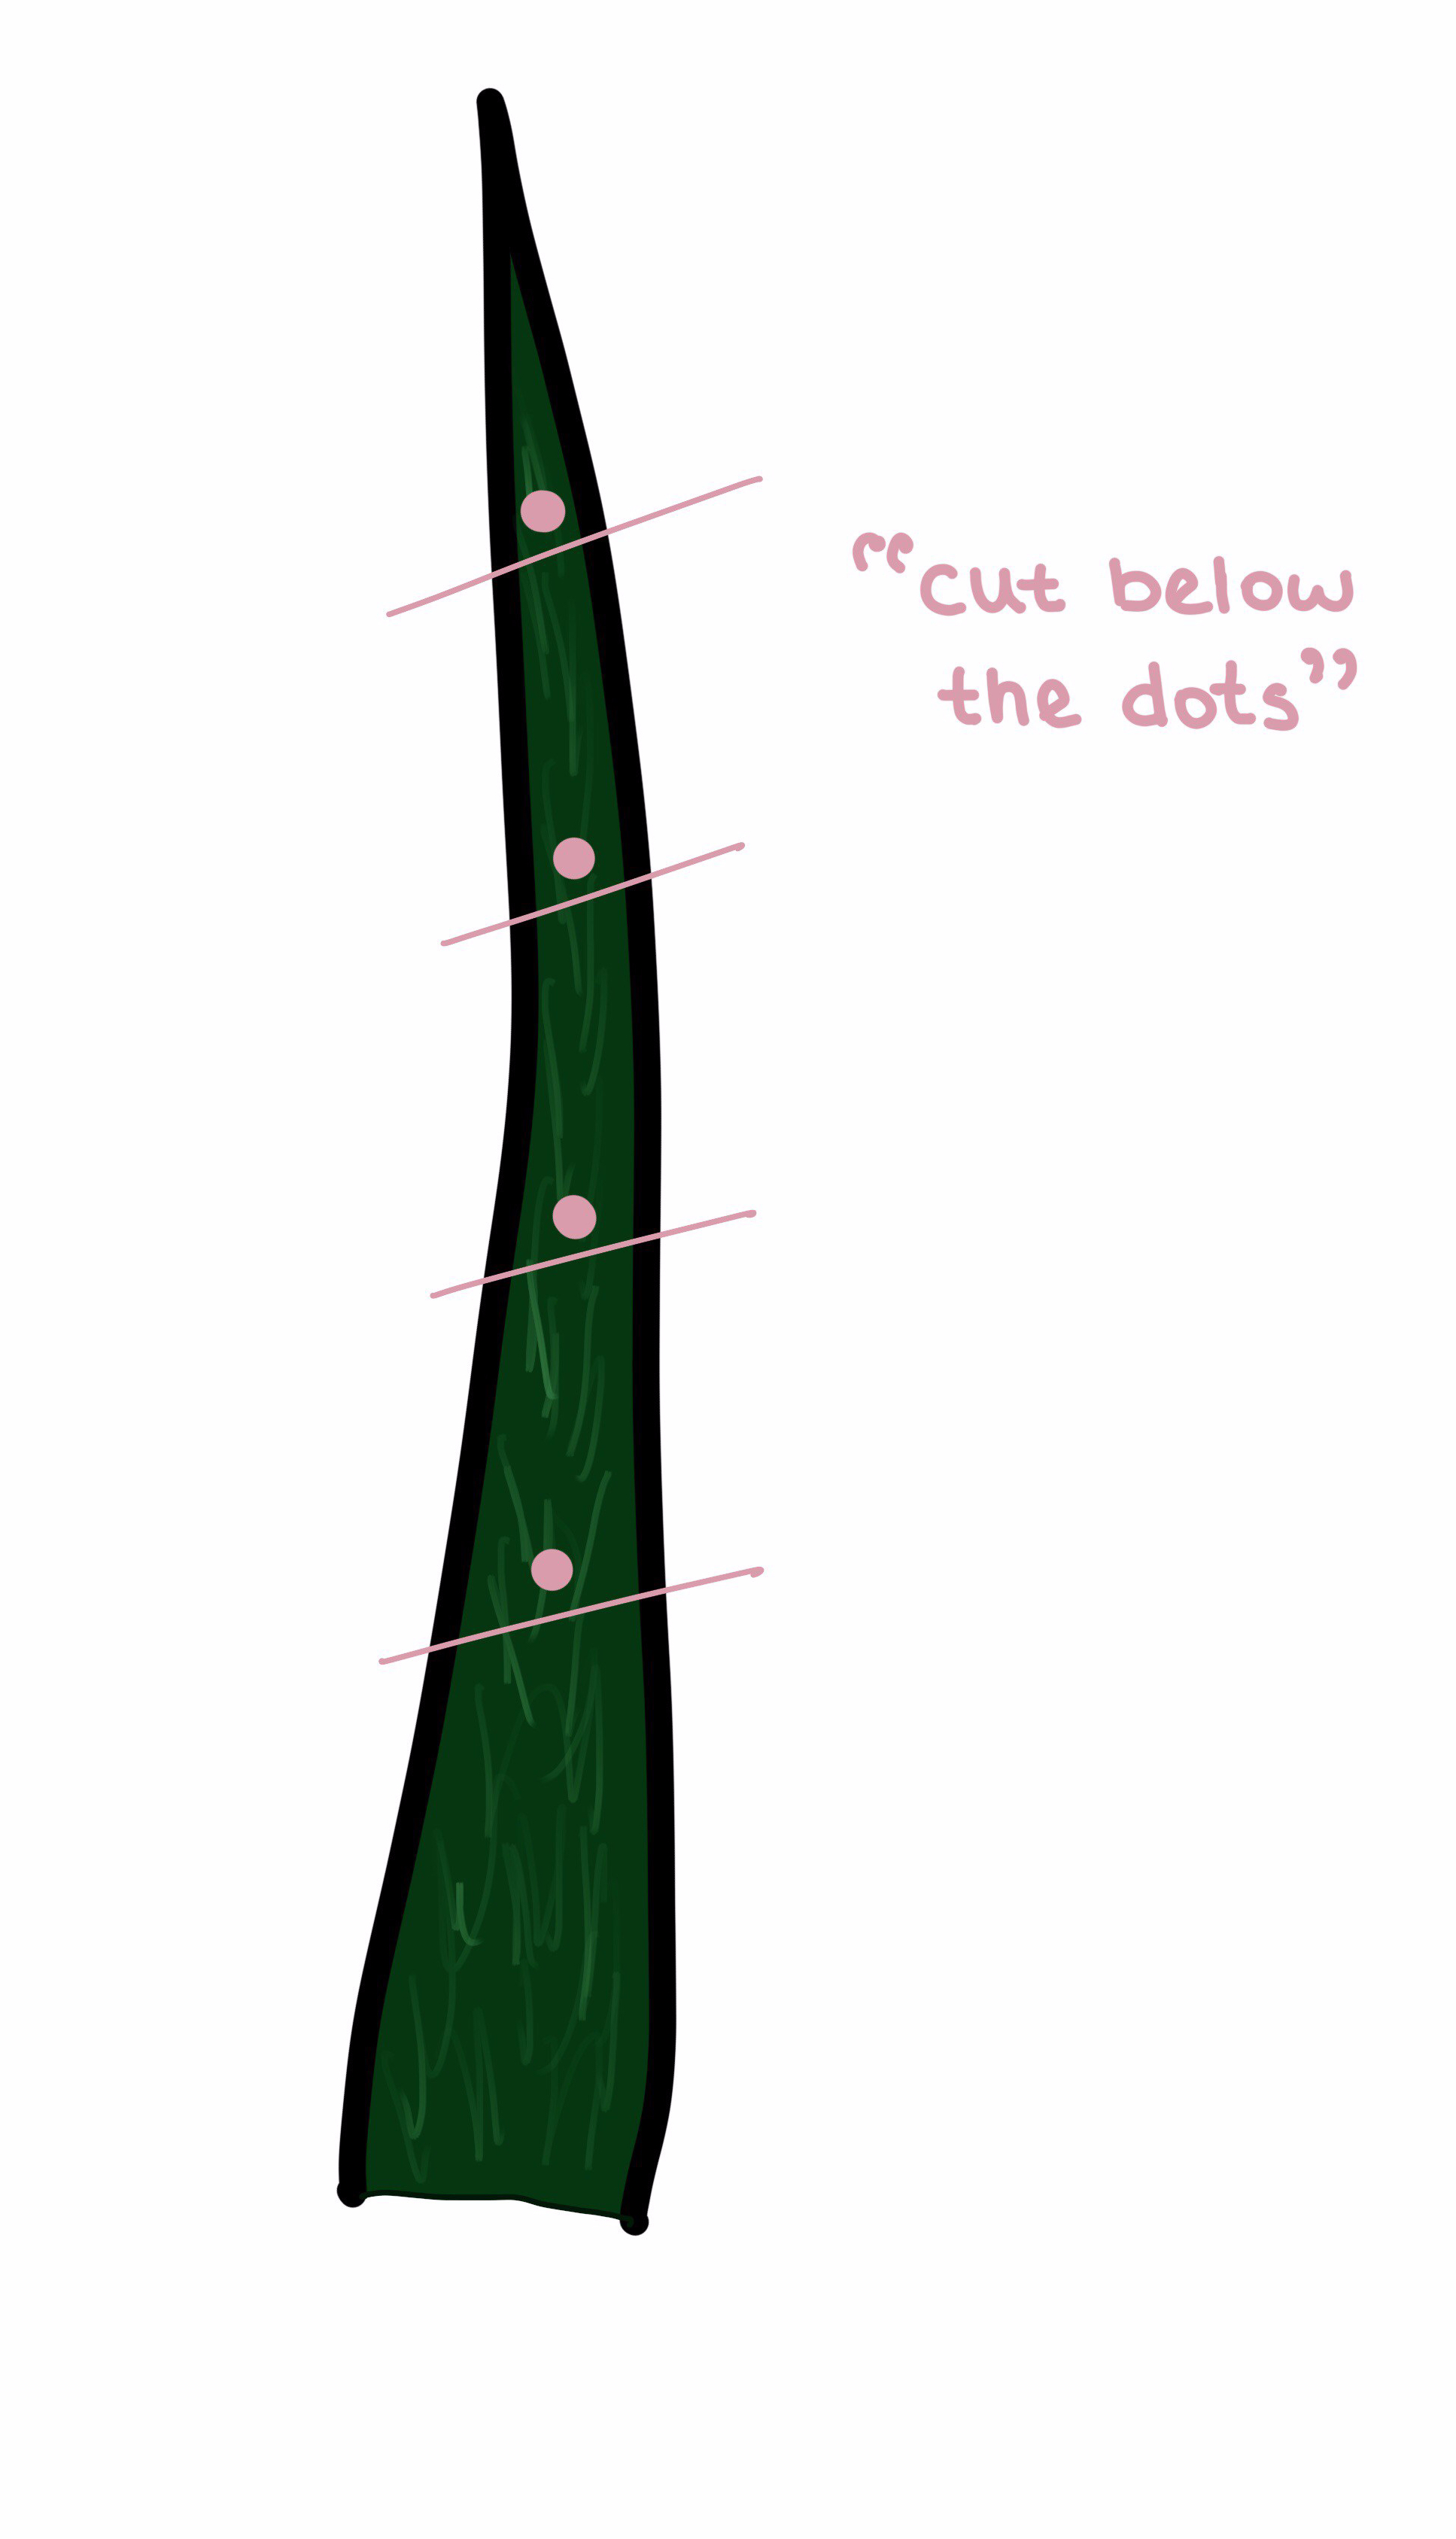
Lay the leaf down and mark a dot every 4-6 inches (see the image to the right).
Cut just below the dot with sharp scissors. If you’re doing this with a child, try to show them the picture or describe the process to them without doing it for them. It is a good exercise in following directions. Needless to say, be careful with scissors and young children.
Prepare holes for the cuttings to go into the potting medium (i.e. wiggle a pencil in there to make a line the shape of the leaf). This is so you don’t rub off the rooting hormone when you stick the cutting in there.
(Optional, though recommended) Dip the dot-side of the leaf into rooting hormone (see discussion section for what this is). I would do this step myself for younger children, but older ones can do it, just make sure they wash their hands afterwards. If you dip the wrong side in, it will not grow.
Put the cuttings into the pot, dot-side down, about 1.5 inches deep or so the leaf won’t tip over. If the wrong side gets put in the dirt, it will not grow (which is why the dots are helpful).
Water, then cover with a plastic bag to keep it moist.
Keep the medium moist and warm, and soon (2-10 weeks) you will have roots! To check, very very gently tug on the leaf. If there is resistance, you probably have roots.
Gently dig up the roots and plant in normal potting soil. A new plant will begin to grow from a newly formed rhizome and pop up through the soil. Snake plants are slow growers, so this might take a while.
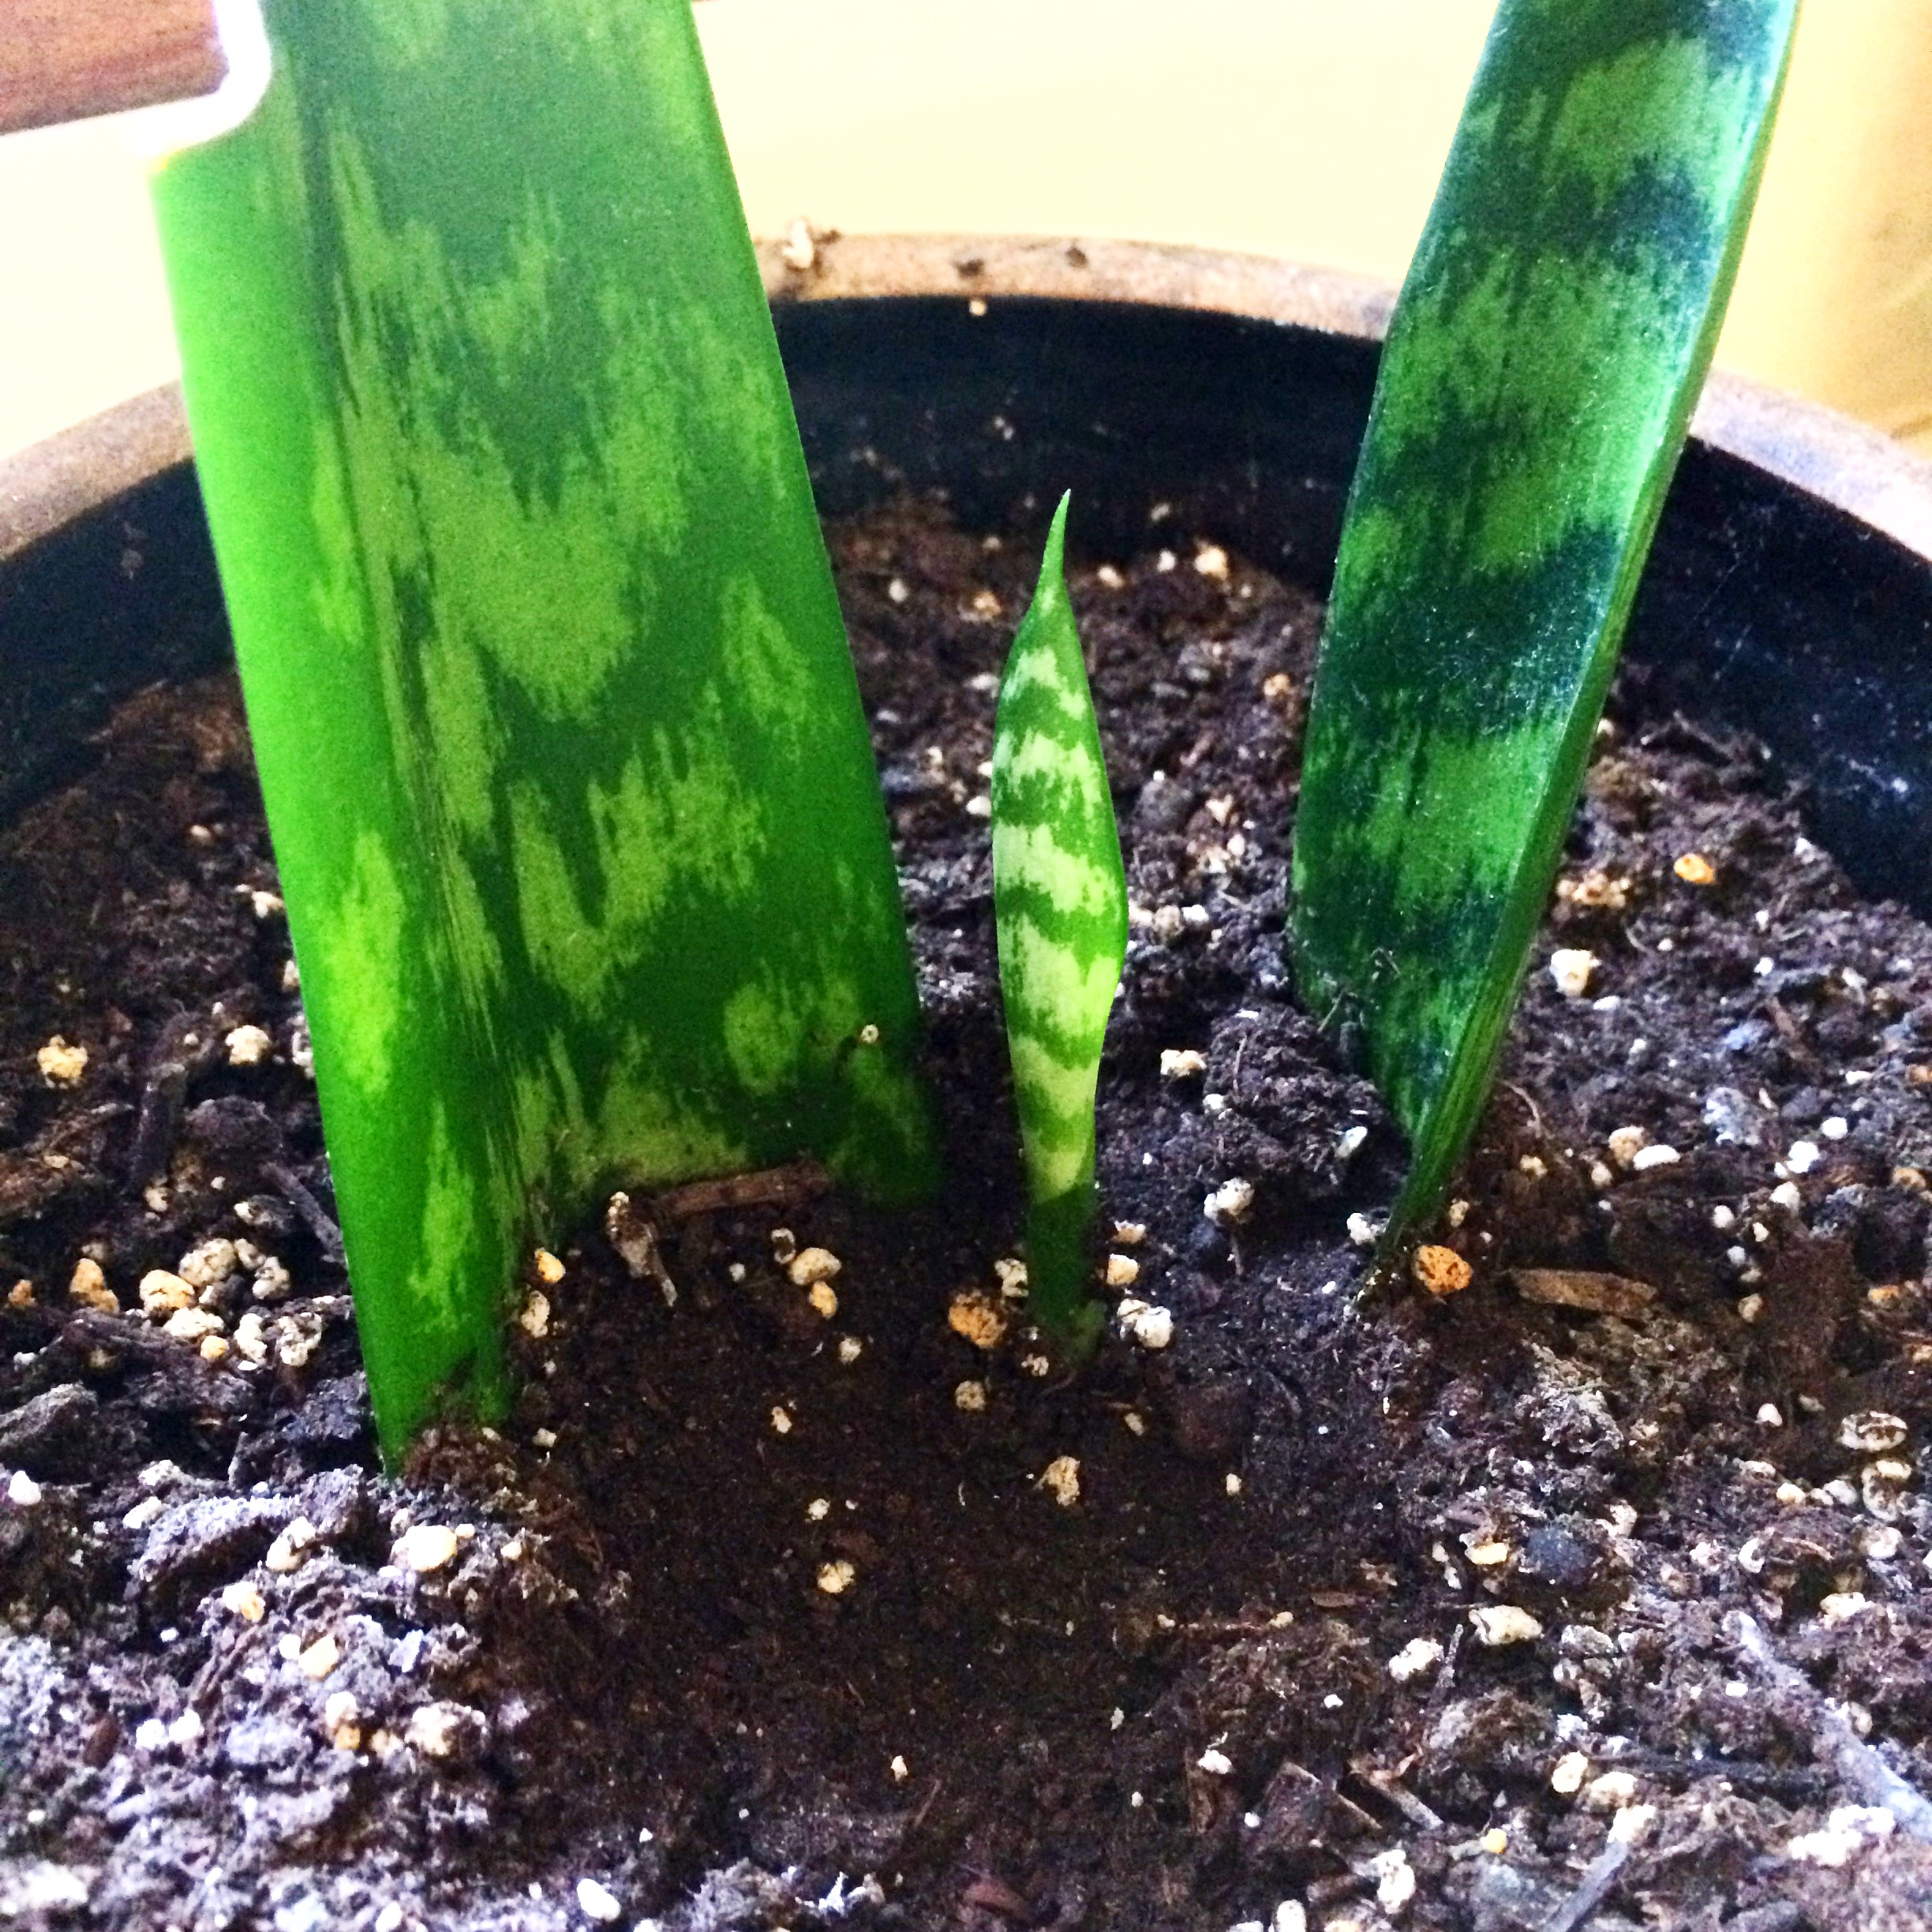
Don’t worry if your cutting dies instead of takes root. It happens. Below is a picture of a not very successful round of propagation. Don’t sweat it.
Two of seven rooted. It is pretty obvious which ones have roots!
The roots grow right out of where you cut the plant! The white thing on the bottom of the pointy leaf is a new rhizome. This will grow under the soil, then produce a new plant.
This is the little baby plant that is growing from the rhizome above.
Discussion
There is SO MUCH science going on here, it’s crazy. I’ll go through some highlights.
This is an asexual process so your new plant and old plant will have the same DNA. Propagation through cuttings is a form of plant cloning. I think this is what they did with Groot in Guardians of the Galaxy II 😉
You want the medium that you put the cuttings into to be non-nutritive to discourage pathogen growth. I’ve also read that you don’t want the plant to take up any nutrients to discourage leaf growth and encourage root growth (so it’ll send roots out searching for more nutritive soil).
You want the cutting to be big enough that it can still get some energy from photosynthesis, but small enough that it’s stressed to encourage root growth. Four to six inches seems to be the sweet spot for snake plants.
Rooting hormone! Although many plants may still root without it, using rooting hormone will up your chances of success. Most commercial rooting hormones are indole-3-butyric acid.
Hormones are molecules that cells and tissues use to communicate. In this case, it signals plants to grow roots.
Stem cells (not talking about cells in the stem of plants, confusing, I know) are special cells that can form other types of cells. The process of a stem cell becoming a specific type of cell is called differentiation. Plants, humans, and all animals began from stem cells differentiating. In the stems of plants, there are partially differentiated stem cells (Stem cells in stems! They couldn’t think of a different word here?!) that when stimulated, will start differentiating down the path to create more root cells. The injury from cutting the plant is stimulus enough to start this process, but you can help it along by using rooting hormone.
For Kids
We all know the “seed in a ziplock bag in the window” project to begin to teach kids about plants, but there are so many other educational and fulfilling projects to do with them. Having them join in with typical houseplant or garden chores is a great way to teach them about plants, responsibility, and pride in your work (and also handling frustration when 80% of your cuttings die). It is also a great way to encourage a love and appreciation of plants, and to fight plant blindness! Snake plants are a great place to start because they are easy to propagate and hard to kill.
For this project, you want to make sure your child knows the main parts of a plant (roots, stem, leaves). It can be as simple as:
Roots get nutrients from the soil
Leaves make energy (carbohydrates) from sunlight through photosynthesis
Stems help deliver nutrients and carbohydrates throughout the plant.
The snake plant is a little confusing because the stem isn’t obvious, but it’s good to learn about the vast variation in plant life.
Depending on their age and science background, you can introduce some of the concepts above, like stem cells or how cells use molecules (the rooting hormone) to communicate. This is an easy yet powerful project that highlights some key concepts about plants and life.
In one bowl, dissolve 1/2 tsp of borax into 1/2 cup of hot water.
In the other bowl, mix 1/4 cup of glue with 1/4 cup water.
A tsp at a time, mix 4-6 tsp of activated charcoal into the glue/water mixture. It won’t mix in at first, but just keep stirring, it will eventually mix in! Just a minute or so of stirring. Stop adding when it’s black enough for you. Mix until thoroughly combined.
Add 12 tsp borax solution to the glue mixture a teaspoon at a time while stirring. This slow addition of the borax ensures a super smooth slime without the need for lots of kneading. You will know when to stop adding when all of the black glue mixture is in the ball of slime and there is none left in a puddle at the bottom of the bowl.
Pick up the glob and fold and squish a few times. You’re done! After you’re finished playing with it, store it in an air tight container. If it feels gooey after a few days, add a little more borax solution till you get the consistency you like. We think this gradual goo-ing might be due to the activated charcoal absorbing some of the borax (see below for what borax does!).
Discussion
The glue contains a long molecule called polyvinyl alcohol (PVA). It is a polymer, which is a molecule that contains repeats of a subunit molecule (for example, “A” is a subunit and “AAAAAAAAAAAAAAA” is a polymer of A). Borax (sodium tetraborate) is a small molecule that can stick to parts of the PVA through a type of weak but plentiful bonds. One side of the borate molecule can stick to one strand of PVA, while the other side of the borate can also stick to a different strand of PVA, creating a bridge between the two PVA strands. This is called crosslinking.
Having many crosslinking sites usually makes a polymer more rigid, but the interesting thing about borate/PVA crosslinking is that the bond is transient, meaning it can easily break and reform somewhere else. This causes the slime to act kind of like a liquid and kind of like a solid. If given time, the PVA can ‘flow’ as gravity pulls and breaks and reforms the borate/PVA crosslinks. It acts like a slime instead of a true liquid because as the PVA molecules pass by more borate, they can momentarily bond to borate and another strand of PVA, slowing down the flow. If you pull the slime fast, you break those bonds at the point of stress quickly, allowing the slime to act like a solid momentarily.
This is a fun, silly, and educational activity that any kid who likes to make noise will love. Using oobleck (a mix of cornstarch and water) and common household items, you will be able to visualize the sound waves made when you yell!
What we perceive as sound is a wave of pressure transmitted through air. When you yell, your vocal chords vibrate. The energy is transmitted by air molecules smacking into each other, until they they smack into your ear. There, you have cells that can convert the vibrations into electrical signals which are transmitted to and deciphered by your brain. In this activity, you will yell into a device that will transmit your sound waves from air into oobleck so you can see the waves!
Definitions
SOUND: Kids will probably know what sound is, but not scientifically. Sound is vibrations that travel through a medium (usually air) which are eventually heard by ears. Kids will need to understand that air, even though we can’t see it, is all around us and can be moved similarly to the way balls move, like billiards. Try waving your hand quickly so they can feel the wind it creates. You can tell them air molecules can move to carry the energy from your hand to their skin so they can feel it. Sound also travels through air in a similar way, but sounds are made when something is wiggling the air much fast than your hand can move it. Roll a ball into another ball and talk about how the energy is transferred when the first ball hits, and use this analogy for air transmitting sound.
VIBRATION: To young kids, I like to explain this as fast wiggles. Since you know your kid the best, to define this word, you can draw on experiences you know they have had like the vibration of an old car going down the highway. You can also put their hands on one end of a table and have them feel the vibration of you knocking at the other end of the table. They probably have experienced vibration, but just need to connect the word with the phenomenon.
Materials
cornstarch
water
empty paper towel or toilet paper tubes
tape
rubber bands
thin flexible material like plastic wrap, latex, thin rubber sheet, nitrile (I cut a square from nitrile gloves)
Method
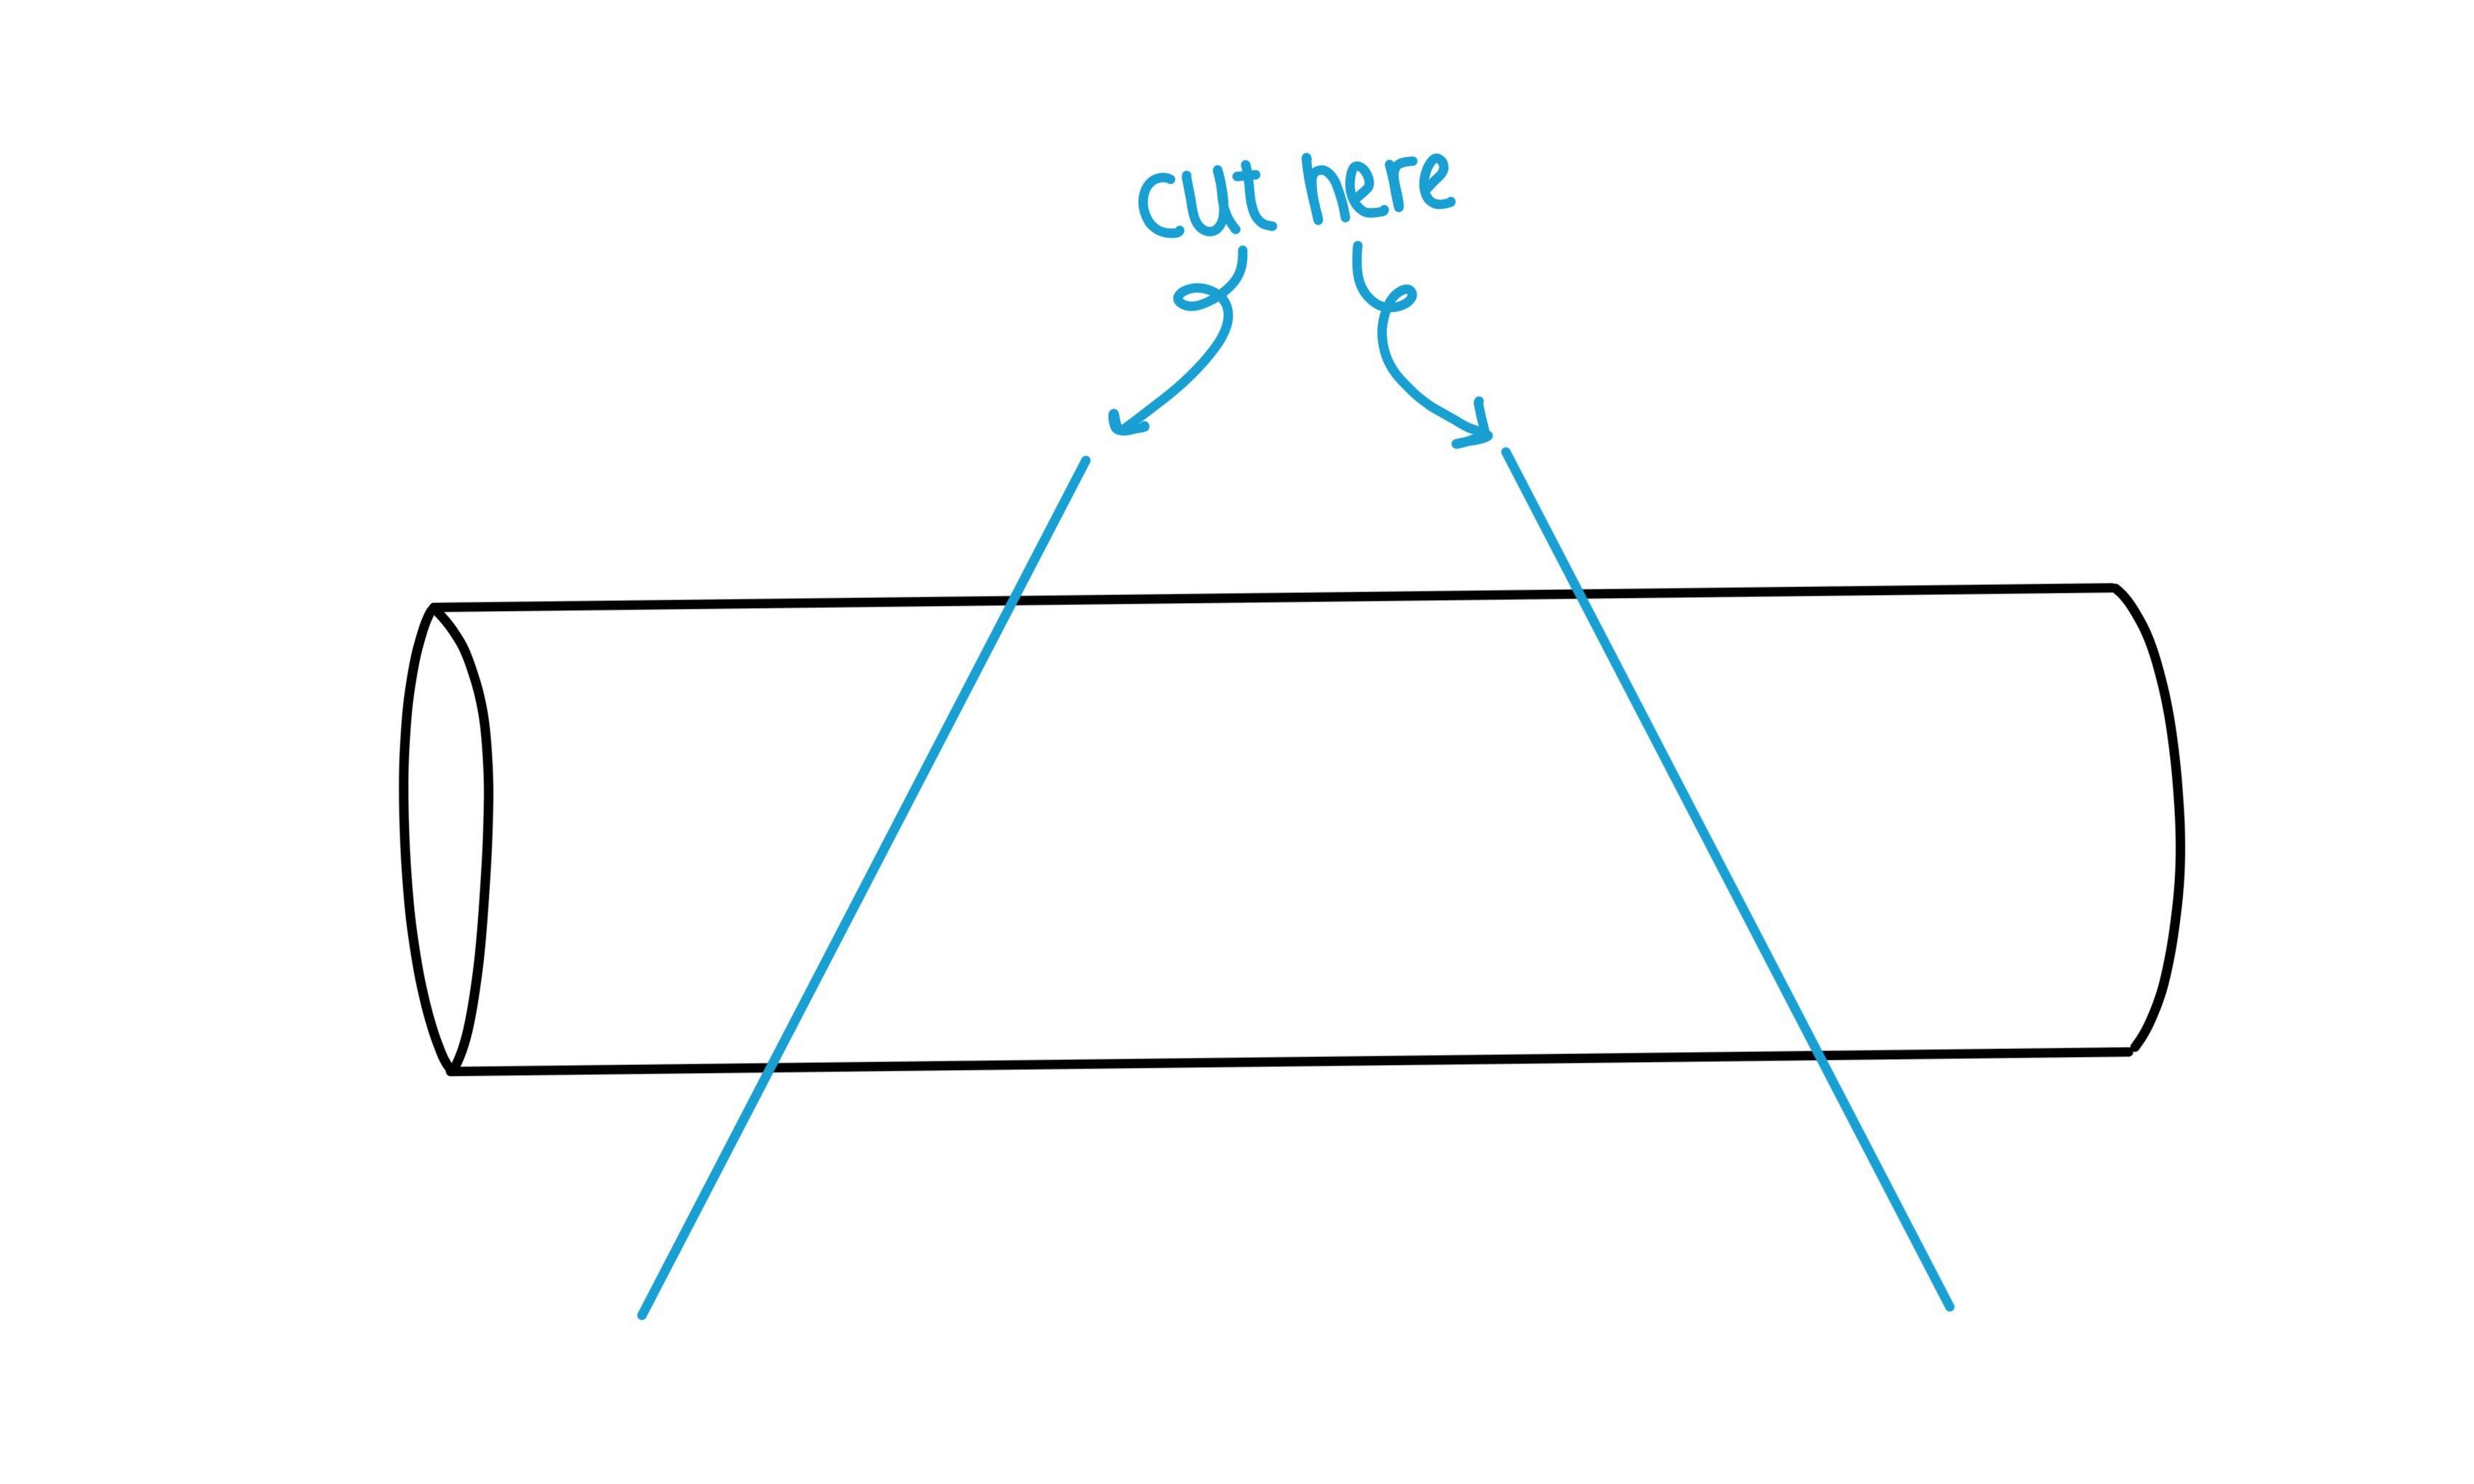
Cut the paper towel roll twice diagonally, as seen in the picture.
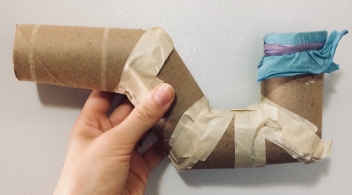
Flip the two end pieces up to form a U shape, then tape them together. (Or make into whatever shape you want. You basically want to be able to simultaneously yell into it and see the flexible membrane. The one below is what my daughter made from toilet paper rolls.).
Clearly, it doesn’t have to look pretty.
Cut your thin flexible material into a square that will fit over the end of the paper towel tube.
Secure the square to the tube with a rubber band, making sure the membrane is taut like a drum.
To make the oobleck, mix about 2:1 cornstarch to water together (you can make a lot to play with it later, but for this activity, you only need about a teaspoon). You will know it’s the right consistency when you can smack the oobleck and it acts like a solid, but you can also slowly pour it as if it was a viscous liquid. Just add a little more cornstarch or water to get this consistency.
Put about an eighth teaspoon of oobleck onto the drum end.
Make all sorts of sounds into the open end of the paper towel roll and watch the oobleck dance about! Constant, steady low or high sounds work the best, but experiment to see what you can make!
Discussion
When you scream into your device, kinetic energy is being transferred from your vocal chords, through the air molecules in the tube, to the membrane, to the oobleck. Note how the oobleck is formed into different shapes depending on the pitch of your noise.
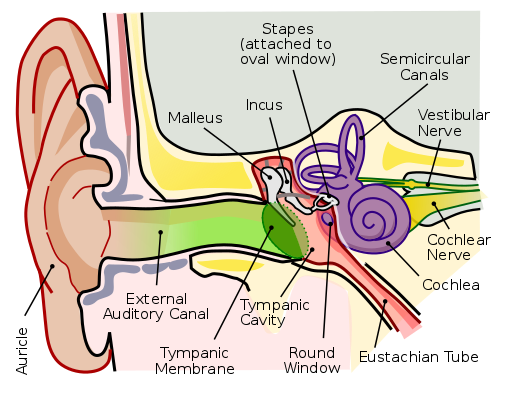
You can use this experiment to talk to your kids about eardrums (aka tympanic membrane) by comparing them to the membrane on the device. Just as the screaming-device-membrane transmits sound from air in the tube to the liquid oobleck on top, your eardrum essentially transmits sound from the air in the ear to liquid in the cochlea.
This project can also be done by wrapping a speaker in Saran Wrap, putting some oobleck on it, and playing your kids’ favorite songs. It’s a great visual introduction to rhythm, beat, and volume and will give them a whole new musical experience.
From 1936-1972, the makers of Fiestaware (and also many other ceramics from that time) used uranium oxide in the glaze to get certain colors, the most common of which is a brilliant redish-orange. This however made the dining sets radioactive.
Production lines initially used uranium from natural sources, which contains a mix of uranium-238 and uranium-235, but during World War II, the US government seized uranium supplies around the country to collect the U-235 for use in atomic weapons. After the war, the ceramics were glazed with “depleted” uranium oxide, which has a smaller percentage of U-235 and therefore “depleted” of the more coveted form of uranium. Eventually, other glazes were developed and uranium oxide was no longer needed to achieve certain colors, but many sets are still available in second-hand markets around the world.
When something is “radioactive,” we are usually referring specifically to ionizing radiation, which is when high energy particles are emitted from an unstable element. Our bodies are bombarded with radiation everyday, coming from sources like cosmic rays from space or the granite in buildings. These, and many other types of exposures, are no cause for concern and are just a normal part of living on earth. Scientists called Health Physicists have studied levels of radiation exposure that are acceptable to humans (i.e. no increase in cancer risk or acute effects) and old, orange Fiestaware use falls into this category. The uranium oxide is encased in the glaze, so although your skin is exposed to the radiation, you will not ingest any, assuming the finish is not cracked.
If you’ve been dreaming of teaching your kids about radioactivity, check out Nuclear Physics for Babies for their first taste of this wild subject. 😉
Landa, E. and Councell, T. Leaching of Uranium from Glass and Ceramic Foodware and Decorative Items. Health Physics 63 (3): 343-348; 1992.
Piesch, E, Burgkhardt, B, and Acton, R. Dose Rate Measurements in the Beta-Photon Radiation Field from UO2 Pellets and Glazed Ceramics Containing Uranium. Radiation Protection Dosimetry 14 (2): 109-112; 1986.